
Updated: September, 2020
A century ago, the founder of Wellesley College (a women's college) said "pies, lies, and doughnuts should never have a place in Wellesley College."
Doesn't sound like a fun college to me, but the students got around the rule by sneaking around and creating a fudgy frosting and a cake to go along with it. Clever girls! The Wellesley Fudge Cake was born.
Known for the thick deeply chocolate frosting and rich cake, there are many versions of this cake.
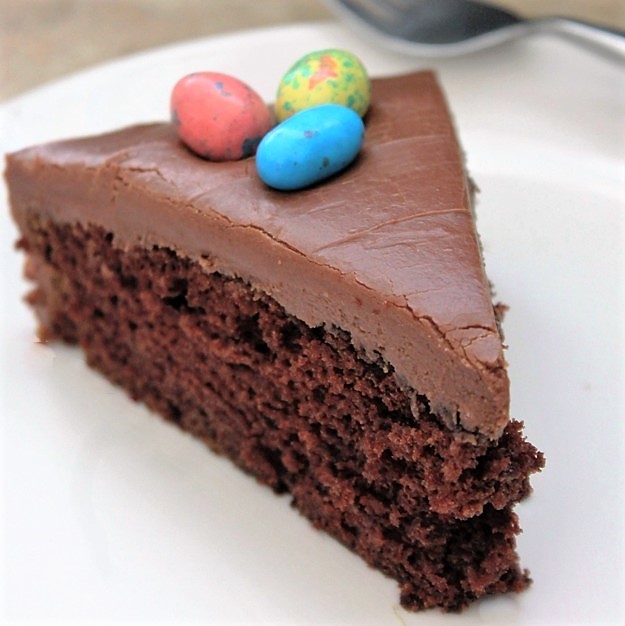
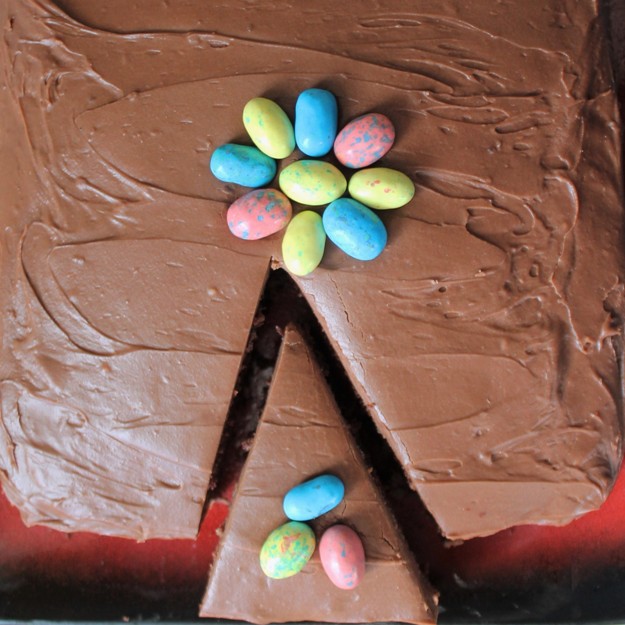
This one is from The Perfect Cake from America's Test Kitchen (#atkcake) for the March Cake Slice Bakers. Of course, I had to decorate it for the season with a few little Easter eggs:
The batter for Wellesley Fudge Cake is beautiful - fluffy and chocolate - and bakes up nicely. I didn't exactly have trouble getting them out of the pan, but when I turned them over to release, the cake is so fluffy and delicate that it absolutely fell into pieces.
ATK's instructions had them sitting in the pan for 15 minutes and it really should be more like 30 minutes until almost cooled.
We ate the layer that fell apart and it was actually quite good! I cooled and refrigerated the other layer overnight and then frosted it the next day.
It's a good, sturdy chocolate cake with chocolate icing, but I'm not sure it's worth the trouble (2 hours to cool the cake, 1 hour to cool the frosting, have to handle the cake very carefully or it will break apart). Update: this cake got more moist and rich the next day - very enjoyable!

I'll stick to Grandmother's Cake-in-the-Pan, which is still not only my favorite chocolate cake with chocolate icing, but also my favorite cake period. Take a look at that one.

Wellesley Fudge Cake
A good, sturdy chocolate cake with chocolate frosting.
Ingredients
- For the Cake:
- 2 ½ C all-purpose flour
- 2 teaspoon baking soda
- 1 teaspoon baking powder
- ½ teaspoon salt
- ¾ C hot water
- ½ C unsweetened cocoa powder
- 16 tablespoon butter, cut into 16 pieces and softened
- 2 C granulated sugar
- 2 large eggs
- 1 C buttermilk, room temperature
- 2 teaspoon vanilla extract
- For the Frosting:
- 1 ½ C packed light brown sugar
- 1 C evaporated milk
- 8 tablespoon butter, cut into 8 pieces and softened
- ¼ teaspoon salt
- 8 oz bittersweet chocolate, chopped
- 1 teaspoon vanilla extract
- 3 C powdered sugar, sifted
Instructions
- For the cake: Preheat the oven to 350°. Grease two 8" square cake pans and line with parchment paper. Grease the parchment paper and lightly flour the pans.
- Whisk the flour, baking soda, baking powder, and salt together in a bowl. Whisk the hot water and cocoa in a small bowl until smooth; set aside.
- Using a stand mixer, beat together butter and sugar on medium-high speed until pale and fluffy, about 3 minutes. Add the eggs, one at a time, and beat until combined. Reduce speed to low and add flour mixture in 3 additions, alternating with the buttermilk in 2 additions. Scrape down the bowl as needed. Slowly add cocoa mixture and vanilla and mix until fully incorporated. Give batter a final stir by hand.
- Divide batter evenly between prepared pans and smooth the tops with the back of a large spoon. Bake until a toothpick inserted in center comes out with a few crumbs attached, 25 to 30 minutes (do not over bake). Rotate the pans in the oven halfway through baking. Remove the pans from the oven and let the cakes cool in the pans on a wire rack for at least 30 minutes. Remove the cakes from the pans, remove the parchment, and let cool completely on the rack.
- For the frosting: Heat the brown sugar, ½ cup of the evaporated milk, 4 tablespoon butter, and salt in a large saucepan over medium heat until small bubbles appear, 4-6 minutes. Reduce heat to low and simmer, stirring occasionally, until large bubbles form and mixture has thickened and turned deep golden brown, about 6 minutes. Transfer to a large bowl.
- Stir in the remaining ½ cup of evaporated milk and remaining 4 tablespoons of butter until mixture is slightly cool. Add chocolate and vanilla and stir until smooth. Whisk in powdered sugar until fully incorporated. Let cool completely, stirring occasionally, about 1 hour.
- Place one of the cake layers on your cake platter. Spread 1 cup of the frosting evenly over the top, right to the edge of the cake. Top with the second layer and spread the remaining frosting evenly over the top and sides of the cake. Refrigerate the cake until the frosting is set, about 1 hour.
Notes
Tips and Stuff:
Be sure and let the cake cool quite a while after you take it out of the oven, or it might fall apart when you take it out of the pan.
Read the recipe carefully and have all of your bowls, utensils and pans at the ready before you start.
This cake gets better and more moist after a day or so in the refrigerator.
Nutrition Information:
Yield: 12 Serving Size: 1 servingAmount Per Serving: Calories: 812Total Fat: 36gSaturated Fat: 22gTrans Fat: 1gUnsaturated Fat: 11gCholesterol: 99mgSodium: 664mgCarbohydrates: 115gFiber: 5gSugar: 87gProtein: 10g
Nutrition Values are Approximate
Sorry that this cake proved to be a little difficult at first, but it definitely looks like it was worth the effort. I checked the book, and there were no extra helpful hints or I definitely would have included them. I'm going to have to check this one out and see if I get the same results as everyone else, and maybe there will be an update in the next edition.
It really got better every day. I highly recommend cooling it longer in the pan before turning out onto the rack, then handling very carefully when taking it out of the pan. I refrigerated the 2nd layer and it worked much, much better. Also I thinned out the frosting so it wouldn't pull the cake apart. Besides that (!) it's an excellent cake! 🙂
Despite your tender crumb it looks like a magnificent bake! And after reading all the excerpts on the posts about Wellesley I have pieced the story together. I love a good story with a slice of cake! And those sweet little eggs on top make me think of childhood and smile. Gorgeous bake as usual!
Thanks so much! I must say, it's better the next day - more moist and it's holding together nicely!
It was frustrating to work with! Can’t wait to get my hands on the book to see what tips they give when making the cake. It had been the most tender cake I have ever made! Despite all your troubles, you ended up with a lovely cake!
Thanks Anabel. The book didn't give any tips on handling it at all. I added a little more evaporated milk just before frosting because I was afraid the icing was too thick and would tear up the cake!